Création d'un premier EJB avec Eclipse et JOnAS26/05/2004
4. Création de l'archive, déploiement de l'application et test de l'EJB
4.1. Création de l'archive
4.2. Déploiement de l'EJB
4.3. Test de notre EJB
4. Création de l'archive, déploiement de l'application et test de l'EJB
4.1. Création de l'archive
Pour générer l'EJB de notre application, le plugin utilise
ant qui est une sorte de make pour java.
L'outil va par la même occasion créer les stubs et skeleton qui vont
nous permettre de communiquer au travers du réseau.
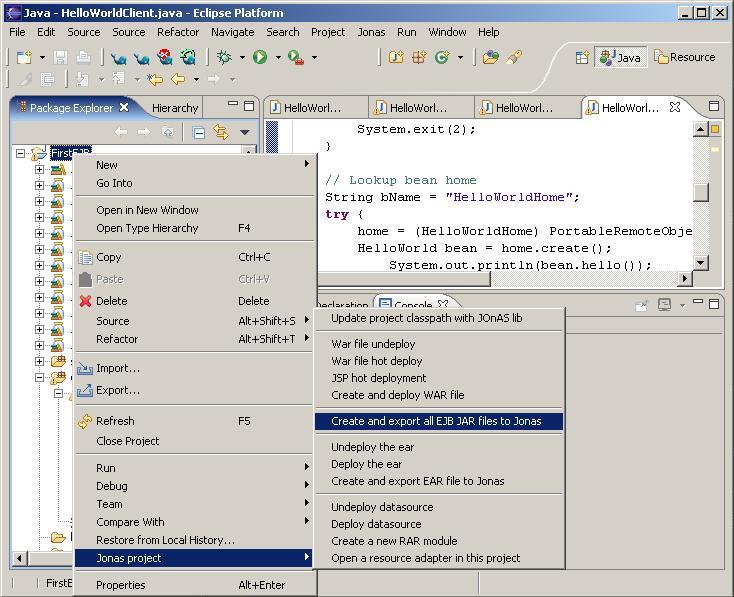
- Choisissez votre projet dans l'arborescence
- Faites un click droit
- Choisissez "Jonas Project --> Create and export all EJB JAR files to Jonas"
Si tout s'est bien passé, voici ce que la console vous a normalement affiché.
Buildfile: D:\Development\eclipse\workspace\FirstEJB\components\build.xml
install:
Trying to override old definition of task ejbjar
init:
    [mkdir] Created dir: D:\Development\eclipse\workspace\FirstEJB\output
    [mkdir] Created dir: D:\Development\eclipse\workspace\FirstEJB\output\ejbjars
jonasejbjar:
   [ejbjar] building helloWorld.jar with 5 files
    [genic] GenIC for JOnAS 4.1: Beans 'HelloWorldEJB' generation ...
    [genic] Stubs and Skels successfully generated for rmi/jrmp
    [genic] Stubs and Skels successfully generated with rmi/jeremie
install:
     [copy] Copying 1 file to D:\Development\JOnAS-4.1\ejbjars
BUILD SUCCESSFUL
Total time: 58 seconds
Si malheureusement la génération et le déploiement
ne se sont pas bien passés, cela peut provenir de 2 choses différentes :
- Soit vous n'avez pas configuré convenablement le path de la JRE dans votre projet
- Soit vous devez modifier l'ordre dans la variable d'environnement path pour que votre $JAVA_HOME/bin pointe en premier lieu
Normalement après avoir effectué ces 2 modifications,
tout devrait rentrer dans l'ordre
4.2. Déploiement de l'EJB
Voici la marche à suivre pour déployer l'EJB.
- Démarrez JOnAS en cliquant sur le 2è bouton fourni par le plugin
Si tout s'est bien passé, voici ce que la concole d'Eclipse vous a affiché.
13:14:44,119 : PolicyProvider.init : Using JOnAS PolicyConfigurationFactory provider
			 and JOnAS Policy provider
13:14:45,853 : TraceCarol.infoCarol : Name service for jrmp is started on port 1099
13:14:46,009 : ServiceManager.startRegistry : registry service started
13:14:46,619 : MBeanServerFactory.createMBeanServerImpl :
			 Created MBeanServer with ID: 15a6029:fda8c31aad:-7ffe:epss04:1
13:14:47,291 : RMIConnectorServer.start : RMIConnectorServer started at:
			 service:jmx:rmi://localhost/jndi/jrmpconnector_jonas
13:14:47,291 : ServiceManager.startJmx : jmx service started
13:14:48,416 : ServiceManager.startServices : jtm service started
13:14:48,744 : HsqlDBServiceImpl.doStart : Starting HSQLDB server 1.7.2 on port 9001
13:14:50,150 : HsqlDBServiceImpl.doStart : HSQLDB server started.
13:14:50,228 : HsqlDBServiceImpl.doStart : Dropping and adding user 'jonas' with password 'jonas'.
13:14:50,244 : ServiceManager.startServices : db service started
13:14:50,416 : DataBaseServiceImpl.createDataSource : Mapping ConnectionManager
			 jdbc:hsqldb:hsql://localhost/db_jonas on jdbc_1
13:14:50,447 : ServiceManager.startServices : dbm service started
13:14:51,416 : ServiceManager.startServices : security service started
13:14:53,431 : JmsAdminForJoram.startMOM : starting MOM on host localhost, port 16010
13:14:53,431 : JmsAdminForJoram.start : starting JmsAdmin with host localhost, port 16010
13:14:54,244 : ServiceManager.startServices : jms service started
13:14:55,432 : Rar.processRar : D:\Development\JOnAS-4.1\rars\autoload\JOnAS_jdbcCP.rar available
13:14:55,682 : Rar.processRar : D:\Development\JOnAS-4.1\rars\autoload\JOnAS_jdbcDM.rar available
13:14:56,010 : Rar.processRar : D:\Development\JOnAS-4.1\rars\autoload\JOnAS_jdbcDS.rar available
13:14:56,228 : Rar.processRar : D:\Development\JOnAS-4.1\rars\autoload\JOnAS_jdbcXA.rar available
13:14:56,228 : ServiceManager.startServices : resource service started
13:14:57,682 : JContainer.addBean : MEJB available
13:14:57,713 : ServiceManager.startServices : ejb service started
13:15:01,182 : Http11Protocol.init : Initializing Coyote HTTP/1.1 on http-9000
13:15:01,307 : StandardService.start : Starting service Tomcat-JOnAS
13:15:01,322 : StandardEngine.start : Starting Servlet Engine: Apache Tomcat/5.0.25
13:15:01,463 : StandardHost.start : XML validation disabled
13:15:01,791 : Http11Protocol.start : Starting Coyote HTTP/1.1 on http-9000
13:15:08,682 : AbsJWebContainerServiceImpl.registerWar :
			 War /D:/Development/JOnAS-4.1/webapps/autoload/ctxroot.war
			 available at the context /.
13:15:09,573 : AbsJWebContainerServiceImpl.registerWar :
			 War /D:/Development/JOnAS-4.1/webapps/autoload/jonas-doc-en/
			 available at the context /jonas-doc-en.
13:15:10,369 : AbsJWebContainerServiceImpl.registerWar :
			 War /D:/Development/JOnAS-4.1/webapps/autoload/jonas-javadoc/
			 available at the context /jonas-javadoc.
13:15:20,651 : AbsJWebContainerServiceImpl.registerWar :
			 War /D:/Development/JOnAS-4.1/webapps/autoload/jonasAdmin.war
			 available at the context /jonasAdmin.
13:15:23,854 : AbsJWebContainerServiceImpl.registerWar :
			 War /D:/Development/JOnAS-4.1/webapps/autoload/tomcat-docs.war
			 available at the context /tomcat-docs.
13:15:23,854 : ServiceManager.startServices : web service started
13:15:25,214 : JContainer.addBean : EarOp available
13:15:26,823 : AbsJWebContainerServiceImpl.registerWar :
			 War /D:/Development/JOnAS-4.1/work/apps/jonas/earsample_2004.06.04-19.22.09/earsample.war
			 available at the context /earsample.
13:15:26,839 : EarServiceImpl.deployEar :
			 Ear file:/D:/Development/JOnAS-4.1/apps/autoload/earsample.ear available.
13:15:26,854 : ServiceManager.startServices : ear service started
The JOnAS Server 'jonas' version 4.1 is ready
13:15:26,870 : Server.start : JOnAS server 'jonas' started on  rmi/jrmp
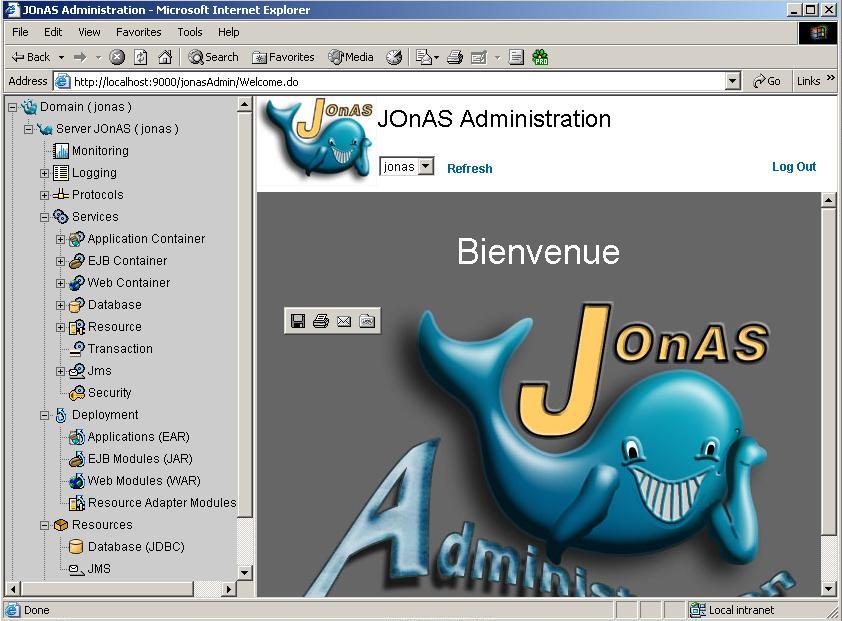
Démarrez la console d'aministration de JOnAS.

Voici la page principale pour administrer JOnAS
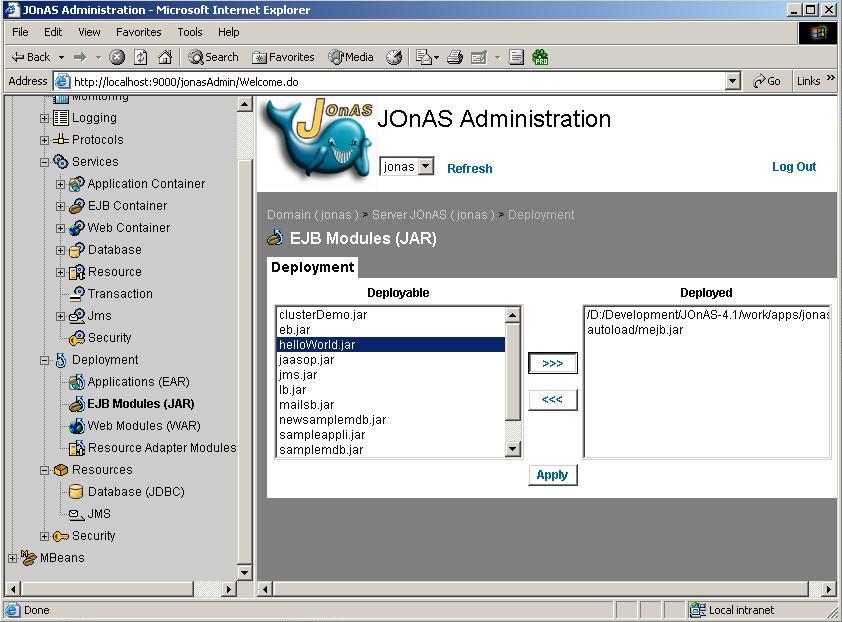
- Cliquez sur le lien "deployements --> EJB Modules (JAR)"
- Choisissez notre EJB : "helloWorld.jar"
- Cliquez sur "deploy" et ensuite sur "apply"
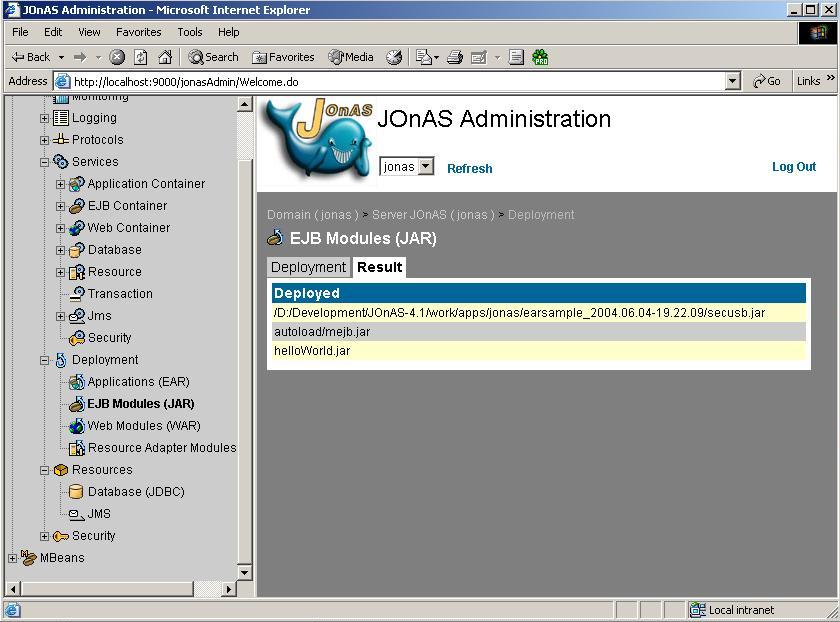
Cliquez ensuite sur confirm.
Voilà, votre EJB est déployé.
Pour pouvoir tester notre client depuis Eclipse, nous allons devoir ajouter
des archives au classpath.
Dans Eclipse, choisissez le bouton pour démarrer le client.
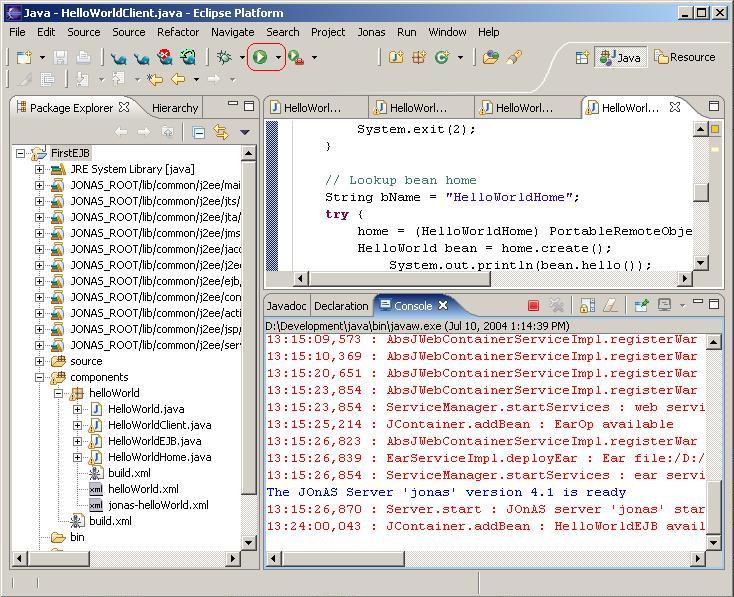
- Choisissez "Run ...". Il va rechercher dans l'arborescence une classe main
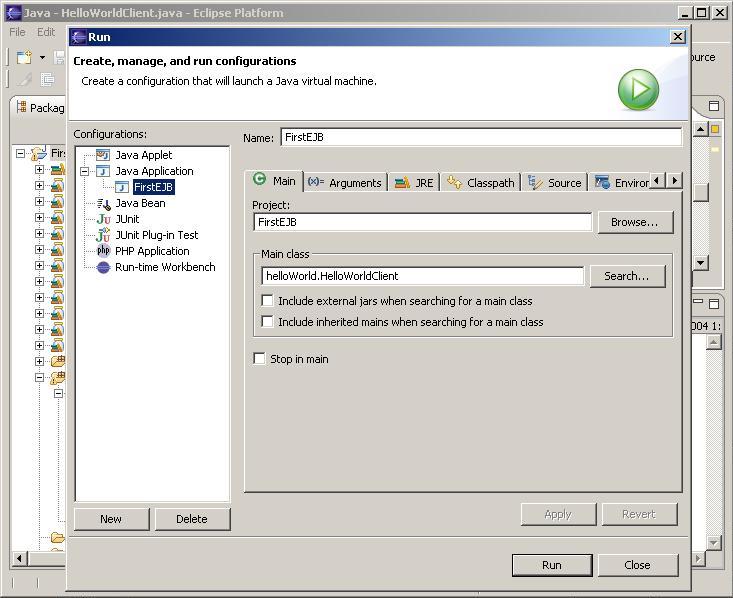
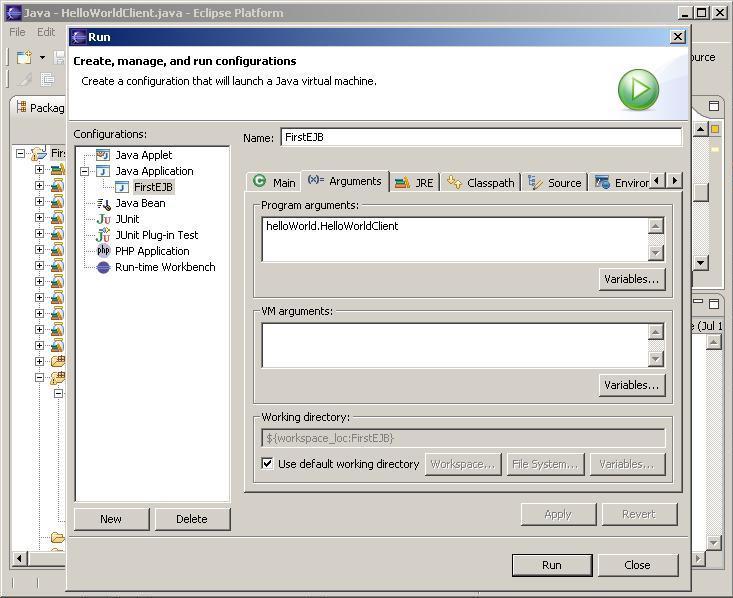
- Allez ensuite dans l'onglet "Arguments" et ajouter l'arguments ci-dessous dans "Program arguments"
helloWorld.HelloWorldClient
- Allez ensuite dans "classpath" et ajoutez l'archive "client.jar" et l'archive de notre EJB
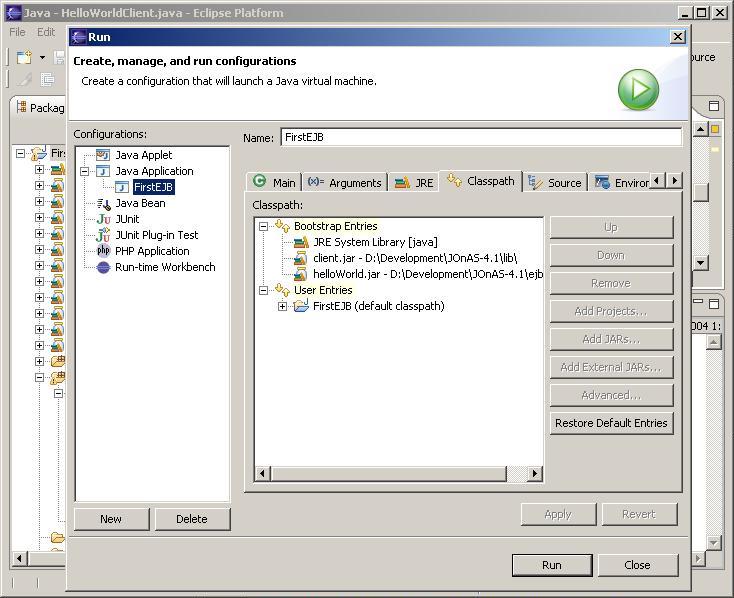
- Cliquez sur le bouton "Apply"
- Cliquez ensuite sur le bouton "Run"
Si tout s'est bien passé, la console d'Eclipse doit vous afficher un beau petit "Hello World"
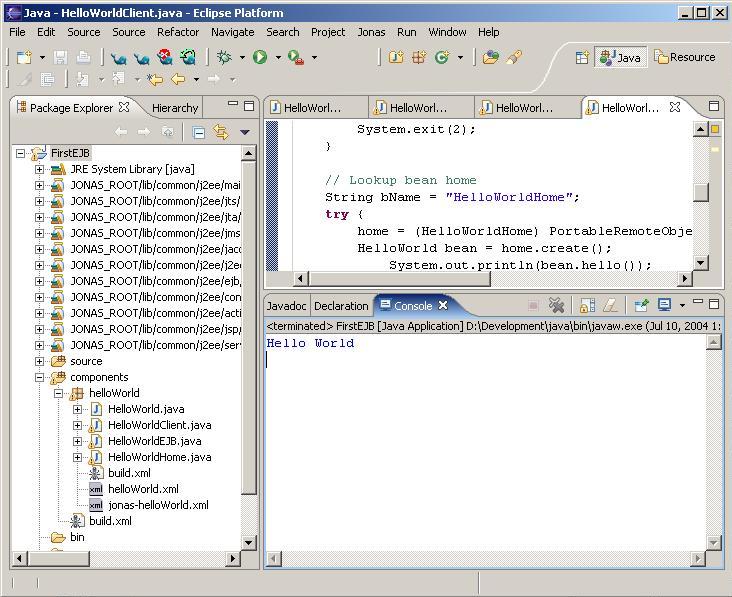
Félicitations, vous venez de déployer votre premier EJB.
Maintenant que vous avez compris le fonctionnement du plugin, il ne vous
reste plus qu'à vous mettre au boulot pour créer vos propres projets.
Bonne chance !
Ce document est issu de http://www.developpez.com et reste la propriété exclusive de son auteur.
La copie, modification et/ou distribution par quelque moyen que ce soit est soumise à l'obtention préalable de l'autorisation de l'auteur.
|